Similar
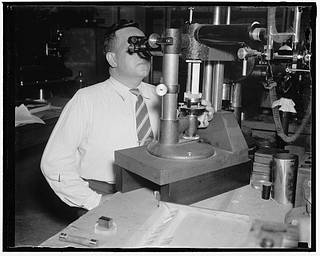
Interferometer tests standard gages for automobile manufacturers. Washington, D.C. May 28. I.J. Fullmer of the Bureau of Standards is shown with an interferometer by means of which differences in length are measured in terms of wave-lengths of light to the millionth of an inch. A four-inch square precision gage is being compared for length with the Bureau's standard 4 inch, which is rectangular in shape. These gages are tested against the master gages which the different auto manufacturers check their measuring devices so that the parts of the cars separately made can be, when assembled, fitted perfectly. The standard gage and the master gage are shwon being compared in the interferometer, 5/28/37
Summary
Public domain photograph of laboratory, scientist, free to use, no copyright restrictions image - Picryl description
Tags
Date
1937
Contributors
Harris & Ewing, photographer
Location
Washington, District of Columbia, United States, 38.90719, -77.03687
Source
Library of Congress
Copyright info
No known restrictions on publication.


